A Beginner’s Guide to Starting Seeds Indoors
 Starting seeds indoors is a rewarding way to kickstart your garden and ensure a thriving outdoor space later in the season. Not only does it allow you to control the environment your plants begin their life in, but it also gives you a head start on the growing season, especially in regions with short summers.
Why Start Seeds Indoors?
Starting seeds indoors offers several advantages:
- Control Over Conditions: You can manage temperature, light, and moisture to give your seedlings the best chance to grow.
- Extended Growing Season: By starting early, you can transplant mature seedlings into your garden when the weather is just right.
- Variety and Choice: Many plants thrive when started indoors, letting you experiment with heirloom varieties or unique cultivars not available as transplants.
Seed Starting Tools and Supplies
Investing in the right supplies is key to successful seed starting. Here’s a list of must-have items to get you started:
- Seed Heat Mat: Provides consistent warmth, which is crucial for germination.
- Seedling Lights: Ensure your seedlings get the right amount of light, especially during short winter days.
- Seed Trays or Starter Pots: These compact containers keep your seedlings neatly organized, and you can also choose a seed tray kit that includes soil for added convenience.
- Seed Starting Mix: A lightweight, well-draining medium designed specifically for young plants.
- Watering Tools: A watering can or gentle spray bottle to keep the soil moist without washing away seeds.
- Labels: To keep track of which seeds are planted where.
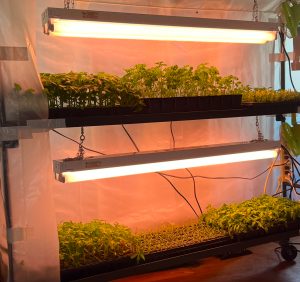
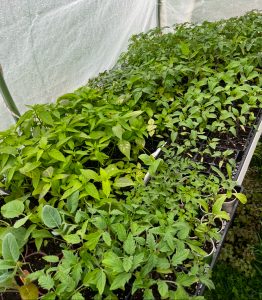
- Greenhouse or Shelves: Consider setting up a small greenhouse or a shelving system. A greenhouse helps maintain stable temperature and humidity, while shelves allow you to organize your seed trays efficiently and maximize space.
Setting Up Your Seed Starting Station
- Choose the Right Spot: Find a location with enough space and easy access to power for your lights and heat mat.
- Arrange Your Equipment: Set up your seed trays on top of the heat mat, and position your seedling lights about 2-4 inches above the seedlings to mimic natural sunlight.
- Prepare the Mix: Fill your trays or pots with seed starting mix. Moisten it lightly before sowing your seeds.
- Customize Your Environment: If you have a small greenhouse, use it to protect your seedlings from drafts and maintain a more stable environment. Alternatively, set up shelves in a well-lit area to organize your trays and create a mini indoor garden.
Planting and Caring for Your Seeds
 Once your station is ready, follow these steps to plant and nurture your seeds:
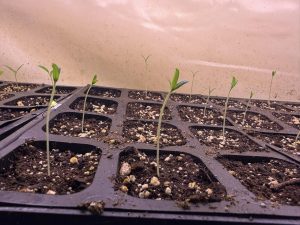
- Sow Your Seeds: Plant seeds at the depth recommended on the seed packet. A general rule is to plant seeds twice as deep as the seed’s size.
- Water Gently: Use a spray bottle to mist the soil evenly, ensuring it’s moist but not waterlogged.
- Monitor Temperature: Keep your heat mat running to maintain a warm environment, which is especially important for tropical and heat-loving plants.
- Provide Adequate Light: Adjust your seedling lights as your plants grow. They should receive at least 12-16 hours of light daily.
Tips for a Successful Seed Starting Experience
- Keep It Clean: Clean your trays and tools before use to prevent disease.
- Thinning: Once seedlings develop their first set of true leaves, thin them out to avoid overcrowding.
- Gradual Transition: Harden Off Your Seedlings: Before transplanting your seedlings into the garden, it’s essential to acclimate them to outdoor conditions—a process known as hardening off.
How to Harden Off Your Seeds
-
- Start Slowly: When the weather is mild and there’s no risk of frost, begin by placing your seedlings in a sheltered, shaded spot outdoors for about 2-3 hours.
- Increase Exposure Gradually: Each day, extend the time your seedlings spend outside by an additional 1-2 hours. Gradually introduce them to more direct sunlight and a bit of wind.
- Monitor Conditions: Avoid harsh weather. If the forecast predicts strong winds or cold temperatures, keep your seedlings indoors until conditions improve.
- Final Steps: Over 7-10 days, work up to leaving your seedlings outside for most of the day. This gradual transition helps reduce transplant shock, ensuring your plants are strong and ready to thrive in your garden.
Starting seeds indoors can be a fun and educational project, setting the stage for a bountiful garden. With the right equipment—whether you choose a greenhouse for a controlled environment or shelves for a space-efficient setup—and a little patience, you’ll enjoy watching your tiny seeds transform into robust plants ready to take on the outdoors. Happy gardening!